안녕하세요 iOS 개발자 루크입니다.
오늘은 UIKit 프로젝트에서 storyBoard 없이 개발하기 위한 초기 설정하는 방법을 알아보겠습니다.
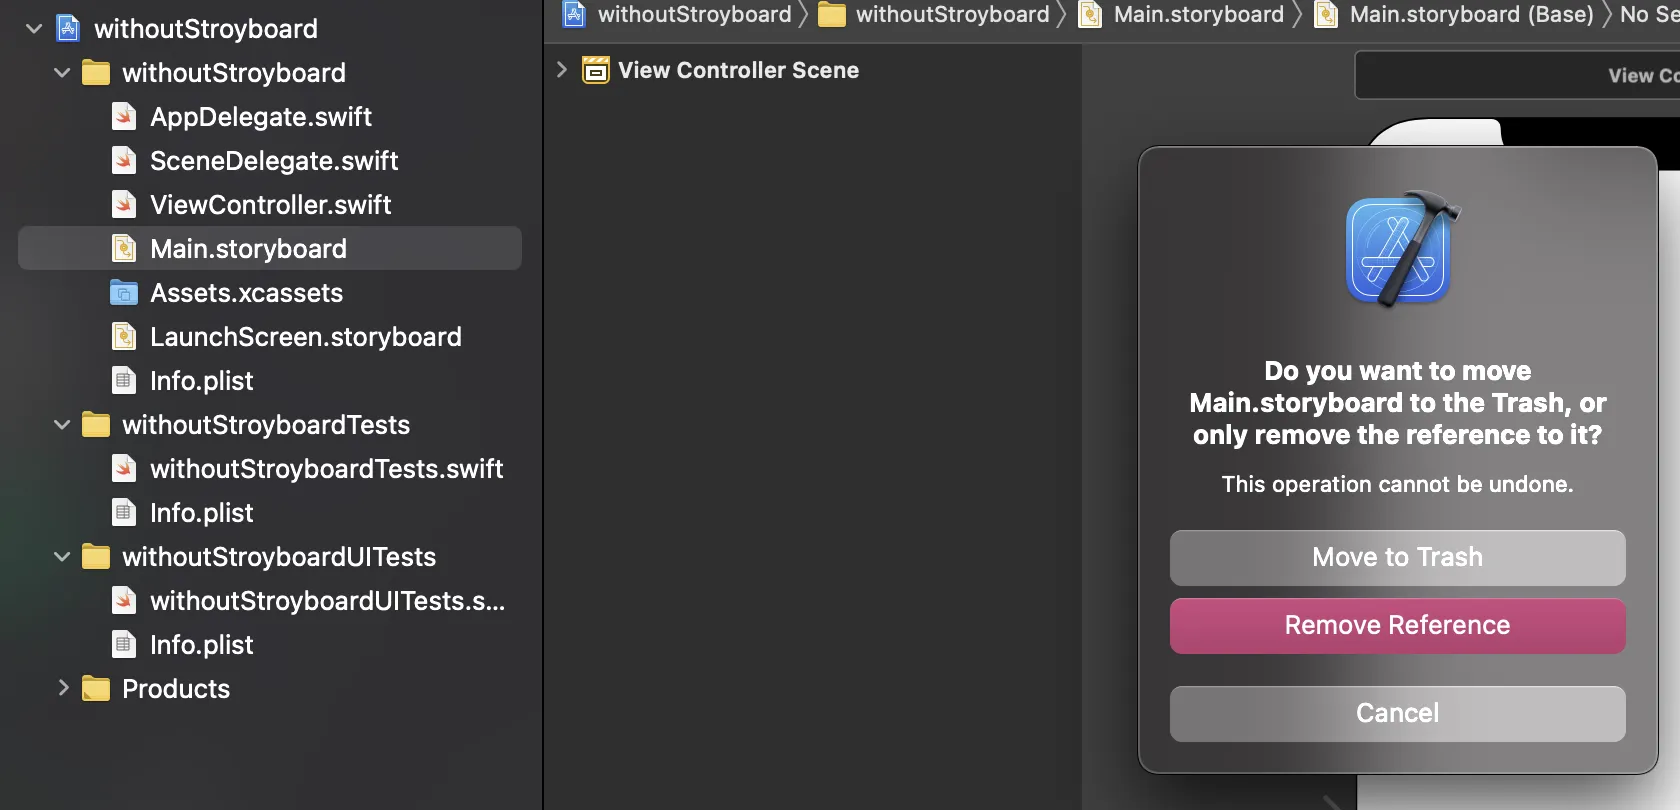
1. Main.storyboard 삭제
먼저 메인 스토리보드 파일을 삭제합니다.
2. info.plist 설정
스토리볻 파일이 삭제되었음을 info.plist 에 반영합니다.
Application Scene Manifest > Scene Configuration → Storyboard Name
- 버튼 눌러서 삭제.
3. Main interface 수정해주기
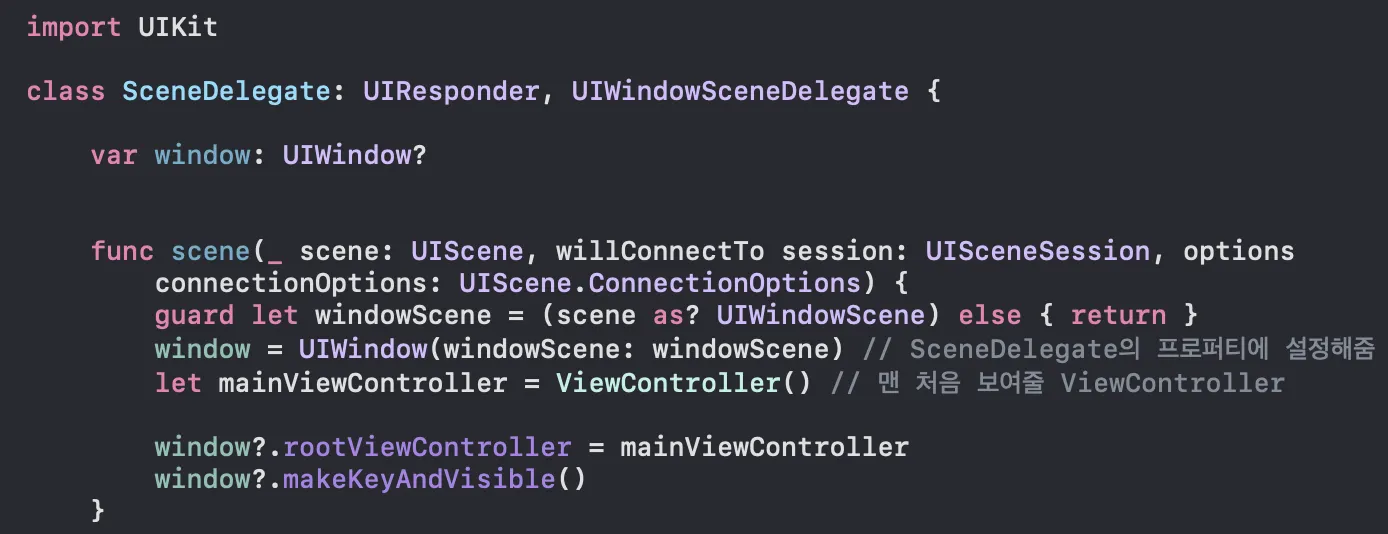
4. SceneDelegate 설정
(iOS 13버전 미만 타겟에서는, AppDelegate의 func application(- application: UIApplication, didFinishLaunchingWithOptions launchOptions: [UIApplication.LaunchOptionsKey: Any]?) -> Bool 메서드 내부에 작업해주세요!)
guard let _ = (scene as? UIWindowScene) else { return }
의 변수에 이름을 지어줍니다.
guard let windowScene = (scene as? UIWindowScene) else { return }
window = UIWindow(windowScene: windowScene) // SceneDelegate의 프로퍼티에 설정해줌
let mainViewController = ViewController() // 맨 처음 보여줄 ViewController
window?.rootViewController = mainViewController
window?.makeKeyAndVisible()
Swift
복사
rootViewController 이 Is Initial ViewController 라고 생각하면 편합니다.
UI를 코드로 짜게 되면 UIViewController 들의 배경색이 검정색입니다.
viewDidLoad 에 배경색과 확인을 위한 라벨을 넣어줍시다.
let test = UILabel()
view.backgroundColor = .white // 배경색
view.addSubview(test)
test.text = "text" // test를 위해서 출력할 라벨
test.translatesAutoresizingMaskIntoConstraints = false
test.centerXAnchor.constraint(equalTo: view.centerXAnchor).isActive = true
test.centerYAnchor.constraint(equalTo: view.centerYAnchor).isActive = true
Swift
복사
5. Navigation Controller 추가하기
네비게이션 컨트롤러를 window 의 rootViewController 로 선언해주면된다.
guard let windowScene = (scene as? UIWindowScene) else { return }
window = UIWindow(windowScene: windowScene)
let mainViewController = ViewController() // 이 뷰컨트롤러를 내비게이션 컨트롤러에 담아볼게요!
let navigationController = UINavigationController(rootViewController: mainViewController) // 내비게이션 컨트롤러에 처음으로 보여질 화면을 rootView로 지정해주고!
window?.rootViewController = navigationController // 시작을 위에서 만든 내비게이션 컨트롤러로 해주면 끝!
window?.makeKeyAndVisible()
Swift
복사


